Kivy は、NUI (Natural User Interface) を持つモバイルアプリやその他のマルチタッチアプリケーションソフトウェアを開発するためのフリーでオープンソースの Python フレームワークです。MIT ライセンスのもとで配布され、Android, iOS, Linux, macOS そして Windows で動作させることができます。
使ったことのなかった Python の GUI ライブラリ(フレームワーク)、Kivy に興味を持ったので [1]、ひととおりウィジェットのサンプルを作ってみようとしています。サンプルを作っていくにあたって、どんなスタイルでコーディングするか、テンプレートみたいなものを固めていこうとあれこれ試し始めました。
今回はプログレスバーのサンプルを紹介します。
Python のコードのみのサンプルと、UI 部分を分離して Kv 言語で記述した同じ動作をするサンプルを併せて紹介しています。
下記の環境で動作確認をしています。
![]() |
Fedora Linux 36 | x86_64 |
python3 | 3.10.5-2.fc36.x86_64 | |
Kivy | 2.1.0 |
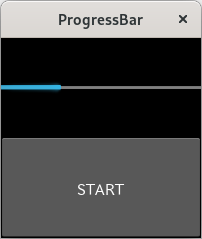
ProgressBar (Python)
ProgressBar は、タスクの進捗状況を視覚化するために使用するウィジェットです。
進捗を表示するデモ用に、threading を使って sleep とループでダミーのタスクを実行しています。しかし、PySide6 (Qt) でスレッドを作るときに比べるとあまりに単純にしてしまっているので、スレッドの扱い方が間違っているかもしれないと心配しています。とりあえず動いていますが…。😅
import threading | |
import time | |
from kivy.app import App | |
from kivy.core.window import Window | |
from kivy.uix.boxlayout import BoxLayout | |
from kivy.uix.button import Button | |
from kivy.uix.progressbar import ProgressBar | |
Window.size = (200, 200) | |
def counter(progress): | |
for c in range(100): | |
time.sleep(0.1) | |
progress.value = c | |
class KivyProgressBar(BoxLayout): | |
pbar: ProgressBar = None | |
def __init__(self): | |
super().__init__() | |
self.orientation = 'vertical' | |
self.init_ui() | |
def init_ui(self): | |
self.pbar = ProgressBar(max=100) | |
self.add_widget(self.pbar) | |
btn = Button(text='START') | |
btn.bind(on_press=self.demo) | |
self.add_widget(btn) | |
def demo(self, instance): | |
threading.Thread(target=counter, args=(self.pbar,), daemon=True).start() | |
class ExampleApp(App): | |
def build(self): | |
self.title = 'ProgressBar' | |
return KivyProgressBar() | |
if __name__ == '__main__': | |
ExampleApp().run() |
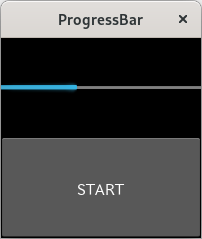
ProgressBar (Python + Kv)
指定したファイルを読み込むようにしたかったので、ここでは Builder.load_file() を使って、指定したファイルを読み込むようにしています。
import threading | |
import time | |
from kivy.app import App | |
from kivy.core.window import Window | |
from kivy.lang import Builder | |
from kivy.properties import ObjectProperty | |
from kivy.uix.boxlayout import BoxLayout | |
Builder.load_file('kivy_progressbar_1.kv') | |
Window.size = (200, 200) | |
def counter(progress): | |
for c in range(100): | |
time.sleep(0.1) | |
progress.value = c | |
class KivyProgressBar(BoxLayout): | |
pbar = ObjectProperty(None) | |
def demo(self, instance): | |
threading.Thread(target=counter, args=(self.pbar,), daemon=True).start() | |
class ExampleApp(App): | |
def build(self): | |
self.title = 'ProgressBar' | |
return KivyProgressBar() | |
if __name__ == '__main__': | |
ExampleApp().run() |
<KivyProgressBar>: | |
pbar: progress | |
orientation: 'vertical' | |
size: root.size | |
ProgressBar: | |
id: progress | |
max: 100 | |
Button: | |
id: btn | |
text: "START" | |
on_press: root.demo(self) | |
Kv 言語で記述したウィジェット(この例の場合、ProgressBar の id: progress)を Python 側から指定するには、次のようにします。
pbar = ObjectProperty(None)
最初の時点では self.pbar は None です。このプロパティは、id: progress で参照される ProgressBar のインスタンスを保持するように Kv 言語で更新されます [2]。
pbar: progress
参考サイト
- bitWalk's: Kivy をちょろっと使ってみた [2022-07-10]
- Kv language — Kivy 2.1.0 documentation
- Widgets — Kivy 2.1.0 documentation
- Progress Bar — Kivy 2.1.0 documentation

にほんブログ村
0 件のコメント:
コメントを投稿