2024-01-28

QMediaPlayer を使ってみる ~ PySide6

PySide (Qt for Python) は、Qt(キュート)の Python バインディングで、GUI などを構築するためのクロスプラットフォームなライブラリです。Linux/X11, macOS および Microsoft Windows をサポートしています。配布ライセンスは LGPL で公開されています。

Qt ライブラリの機能は GUI 部品にとどまらず、とても広範なので、使ったことの無い機能がたくさんあります。今回は、そのうち、動画再生に利用できる QMediaPlayer で MP4 ファイルを再生する簡単なサンプルを紹介します。

下記の OS 環境で動作確認をしています。

Fedora Workstation 39 x86_64
Python 3.12.1
PySide6 6.6.1

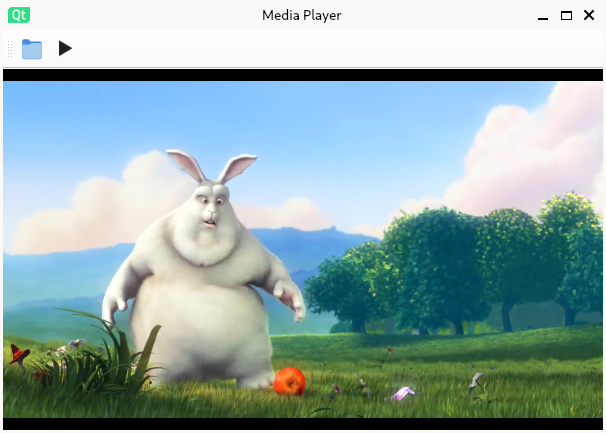
以下のスクリーンショットは、参考サイト [4] から MP4 ファイルをダウンロードして、それを読み込んで再生している例です。

qt_mediaplayer.py の実行例

サンプルは、ツールバーの部分である MyToolBar クラスと、本体 Example クラスに分けました。

qt_mediaplayer_toolbar.py
from PySide6.QtCore import Signal
from PySide6.QtGui import QIcon
from PySide6.QtWidgets import (
QFileDialog,
QStyle,
QToolBar,
QToolButton,
QWidget,
)
def get_icon(parent: QWidget, name: str) -> QIcon:
pixmap = getattr(QStyle.StandardPixmap, name)
icon = parent.style().standardIcon(pixmap)
return icon
class MyToolBar(QToolBar):
playVideo = Signal()
readVideo = Signal(str)
def __init__(self):
super().__init__()
# Ioen
but_open = QToolButton()
but_open.setIcon(get_icon(self, 'SP_DirIcon'))
but_open.clicked.connect(self.on_clicked_open)
self.addWidget(but_open)
# Play
but_play = QToolButton()
but_play.setIcon(get_icon(self, 'SP_MediaPlay'))
but_play.clicked.connect(self.on_clicked_play)
self.addWidget(but_play)
def on_clicked_open(self):
dialog = QFileDialog()
dialog.setWindowTitle('Open video file')
dialog.setNameFilter('Video (*.mp4)')
if dialog.exec():
filename = dialog.selectedFiles()[0]
self.readVideo.emit(filename)
def on_clicked_play(self):
self.playVideo.emit()
qt_mediaplayer.py
#!/usr/bin/env python
# coding: utf-8
import sys
from PySide6.QtCore import QUrl
from PySide6.QtMultimedia import QAudioOutput, QMediaPlayer
from PySide6.QtMultimediaWidgets import QVideoWidget
from PySide6.QtWidgets import QApplication, QMainWindow
from qt_mediaplayer_toolbar import MyToolBar, get_icon
class Example(QMainWindow):
def __init__(self):
super().__init__()
self.player = QMediaPlayer()
self.init_audio()
self.init_video()
self.setWindowIcon(get_icon(self, 'SP_TitleBarMenuButton'))
self.setWindowTitle('Media Player')
self.resize(600, 400)
def init_audio(self):
audio = QAudioOutput(self)
self.player.setAudioOutput(audio)
audio.setVolume(50)
def init_video(self):
toolbar = MyToolBar()
toolbar.readVideo.connect(self.on_read_video)
toolbar.playVideo.connect(self.on_play_video)
self.addToolBar(toolbar)
video = QVideoWidget(self)
self.player.setVideoOutput(video)
self.setCentralWidget(video)
def on_read_video(self, filename: str):
self.player.setSource(QUrl.fromLocalFile(filename))
def on_play_video(self):
self.player.play()
def main():
app = QApplication(sys.argv)
win = Example()
win.show()
sys.exit(app.exec())
if __name__ == '__main__':
main()

サンプルを実行すると下記のようなメッセージが出ます。メッセージが出ても MP4 のファイルの再生はできているのですが、メッセージの解消方法が判れば追記します。

(venv) $ python qt_mediaplayer.py
qt.multimedia.ffmpeg.libsymbolsresolver: Couldn't load VAAPI library

このサンプルは、MP4 ファイルを読み込んで、再生するだけのものです。

サンプルの大まかな流れは、まず QMediaPlayer のインスタンス self.player を作成し、QAudioOutput で音、QVideoWidget で動画の出力先のインスタンスをそれぞれ作成して self.player に登録します。

self.player = QMediaPlayer()
 
audio = QAudioOutput(self)
self.player.setAudioOutput(audio)
 
video = QVideoWidget(self)
self.player.setVideoOutput(video)

MP4 ファイル filenameself.player に読み込んで play メソッドで再生します。

self.player.setSource(QUrl.fromLocalFile(filename))
 
self.player.play()

QMediaPlayer の機能を試しながら、もっと使いこなせるようにしていきたいです。

参考サイト

  1. QMediaPlayer - Qt for Python
  2. QAudioOutput - Qt for Python
  3. QVideoWidget - Qt for Python
  4. Download Sample Videos / Dummy Videos For Demo Use
  5. Video Overview | Qt Multimedia 6.6.1


ブログランキング・にほんブログ村へ bitWalk's - にほんブログ村 にほんブログ村 IT技術ブログ オープンソースへ
にほんブログ村

オープンソース - ブログ村ハッシュタグ
#オープンソース


0 件のコメント: